How to adjust a handle that is up or down
Rough-in wall valve installations
Our wall faucet spouts can be set at 3 different depths out from the finished wall. The depth you install the wall valve in the wall will dictate how far out your stem will be. This can be important for those who desire a particular depth based on the sink they are using and where the stem is in relation to the center of the sink. The range of depth is 7” - 7-1/2” or 8” out from finished wall to the center of the spout tip. Please be sure to check your sink to see which spout length works best for your installation. See details below to install for the spout length you choose.

Choose the depth of your wall faucet spout off the wall
Your Bathhouse wall faucet has 3 different lengths that it can be set at off the wall. You may want to consider the sink that you are using and where the tip of the spout is in relationship to the center of the sink bowl. Once you decide the depth of your faucet spout, you can use the dimensions below to determine how far in your valve needs to be. (Our 22” Reproduction sinks would use the 7” spout dimensions and our 30” Reproduction sink would use the 8” spout dimensions)
Installing the rough-in wall valve


Fastening the wall valve to the blocking
Fasten the wall valve to the blocking using the supplied blocking clamps. Be sure that the water line outlets for water line connections are facing down. See below to determine how far back to set your valve and blocking in the wall.
Wall spout out 7” out from wall (For 22” Reproduction sink)
Follow these steps for a spout that reaches out 7” from finished wall to the center of the spout tip. BE SURE TO ADD ON TO THE WALL STUD THE FINISHED WALL TILE/STONE BACKSPLASH OR WALLBOARD THICKNESS. Failing to account for the thickness of the tile, stone backsplash or wallboard will reduce the depth of how far out your spout comes.

Wall spout out 7-1/2” from wall
Follow these steps for a spout that reaches out 7-1/2” from finished wall to the center of the spout tip. BE SURE TO ADD ON TO THE WALL STUD THE FINISHED WALL TILE/STONE BACKSPLASH OR WALLBOARD THICKNESS. Failing to account for the thickness of the tile, stone backsplash or wallboard will reduce the depth of how far out your spout comes.
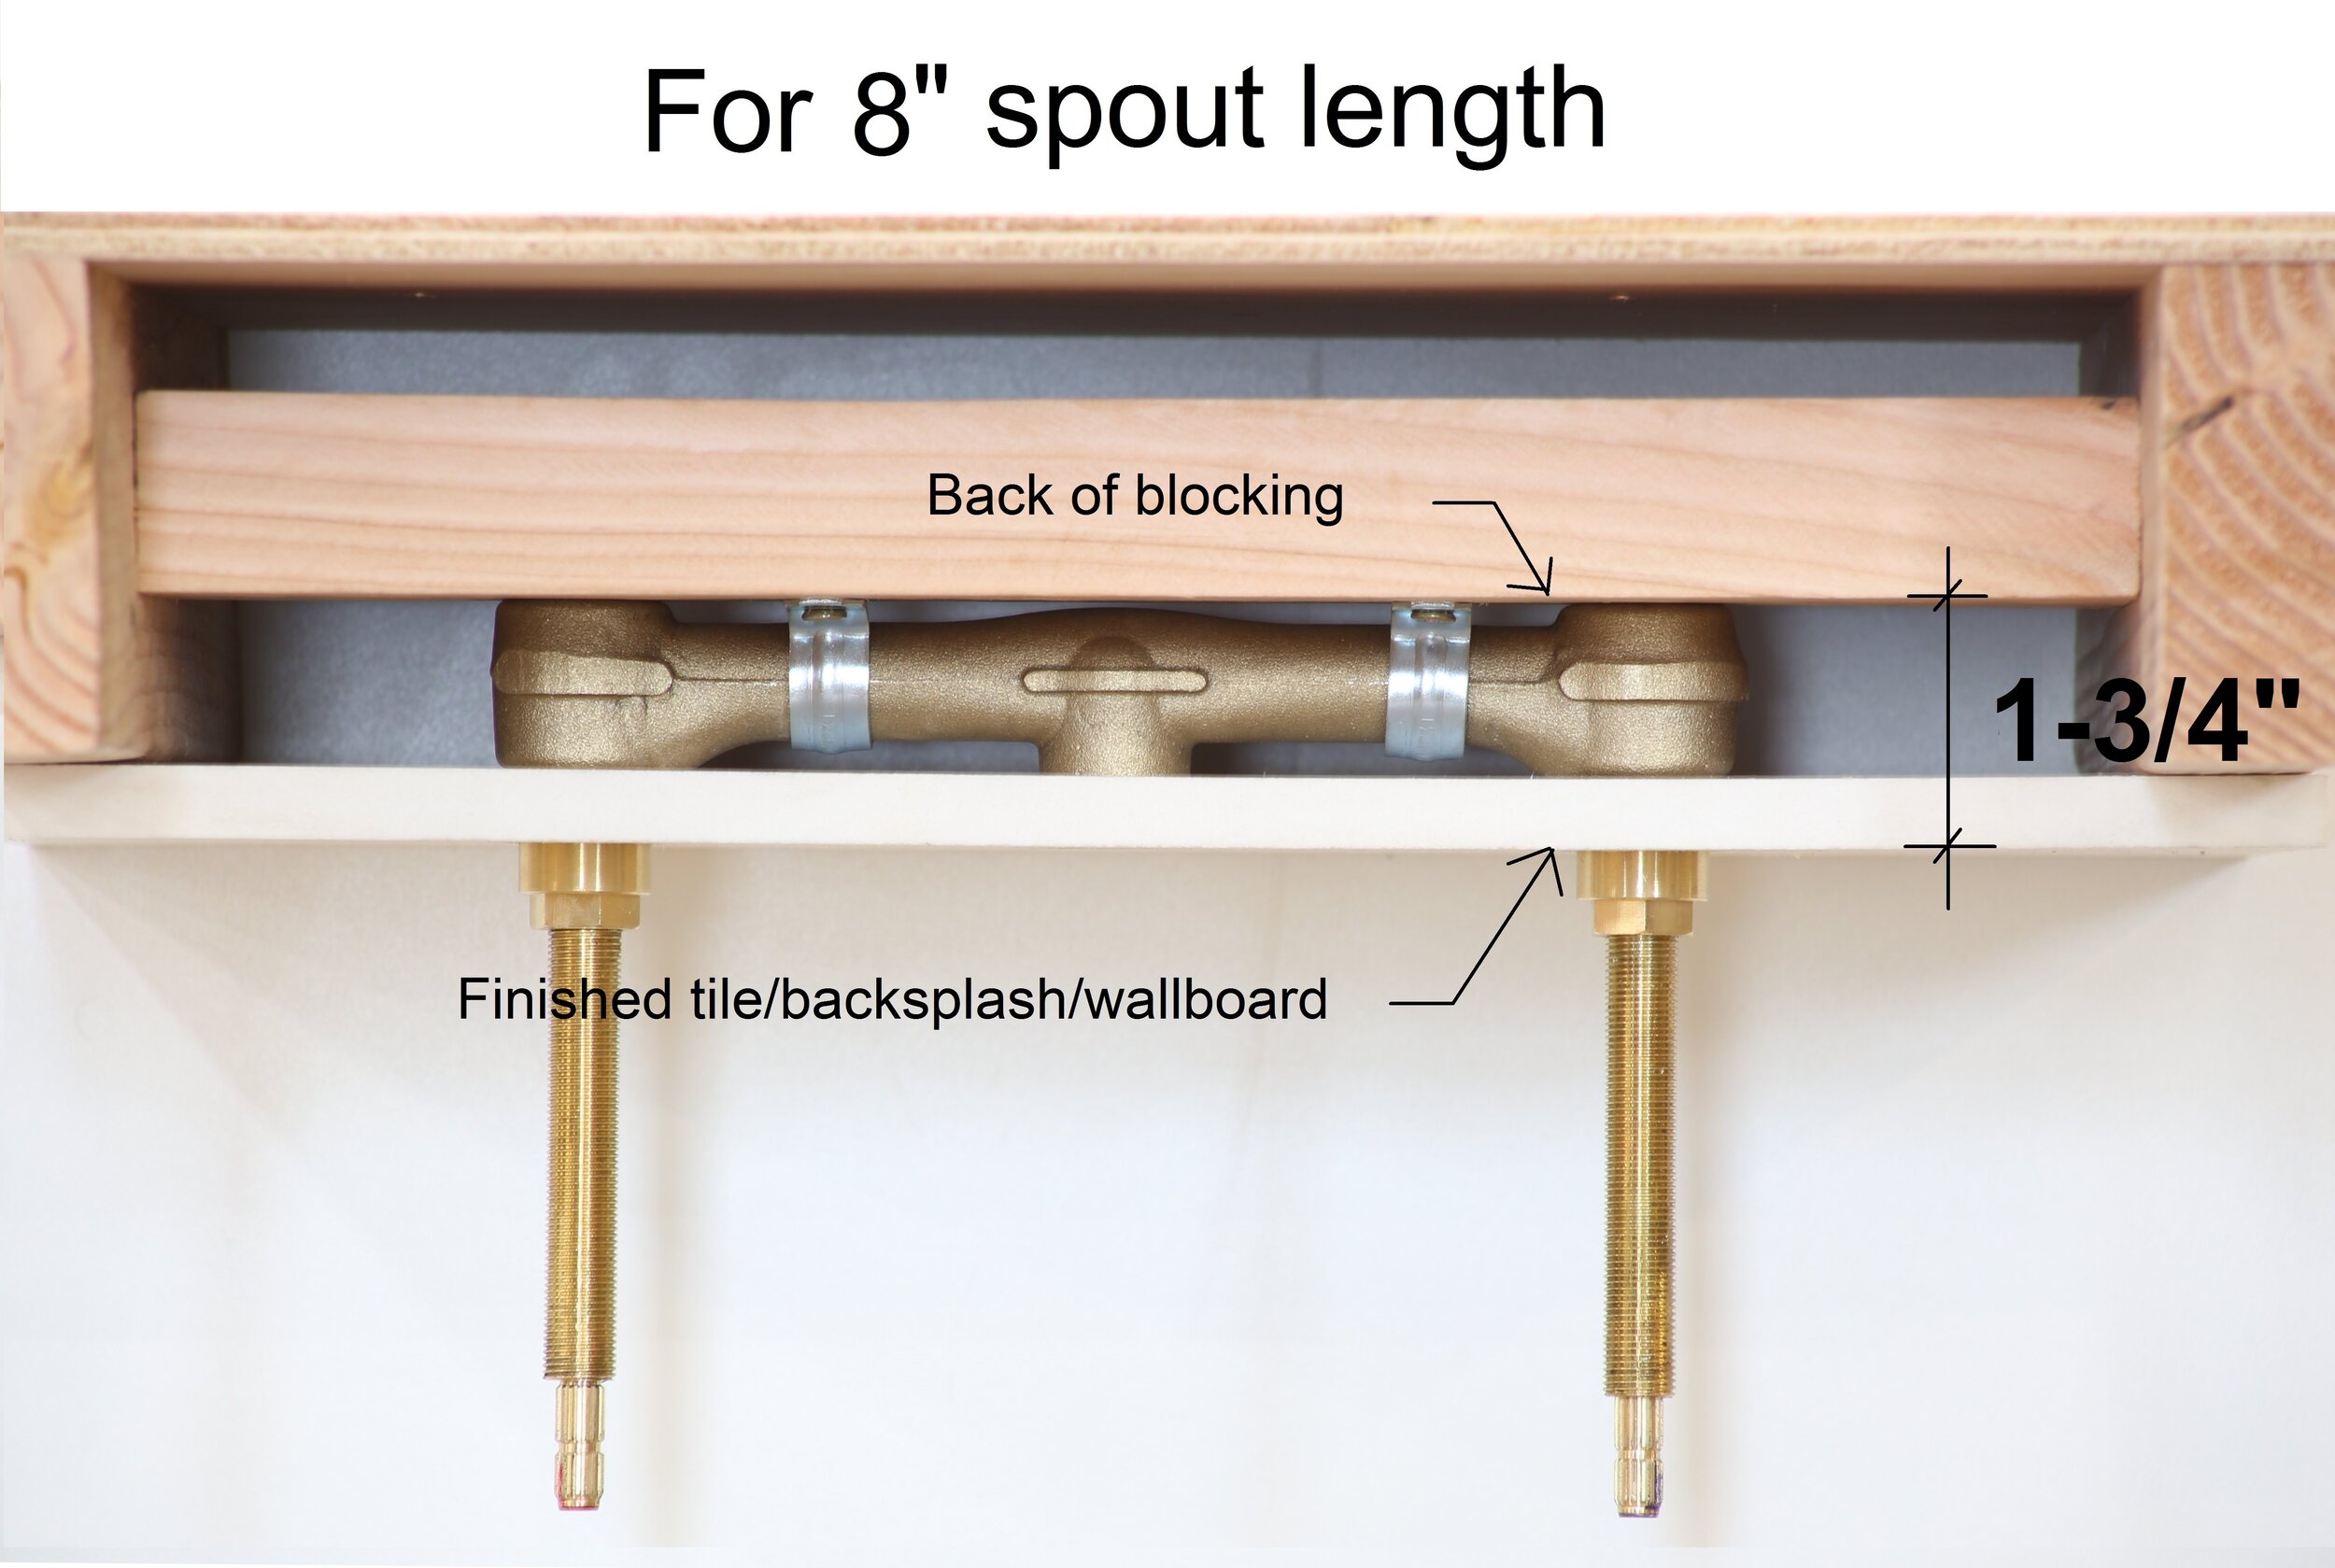
Wall spout out 8” from wall (For your 30” Reproduction sinks)
Follow these steps for a spout that reaches out 8” from finished wall to the center of the spout tip. BE SURE TO ADD ON TO THE WALL STUD THE FINISHED WALL TILE/STONE BACKSPLASH OR WALLBOARD THICKNESS. Failing to account for the thickness of the tile, stone backsplash or wallboard will reduce the depth of how far out your spout comes.
Cutting the valve stems

Review photo to see which ring you are to cut valve stem at based on spout length. It is recommended to cut off the valve spline with a fine hacksaw blade by hand. For a 7” spout length, you would cut the spline off at the 3rd recessed ring. For the 7-1/2” spout length, you would cut of the spline at the 4th recessed ring. For the 8” spout length, you would cut off the spline at the 5th recessed ring. (For our 22” Reproduction sinks you would cut at the 3rd recessed ring. For our 30” Reproduction sinks you would cut at the 5th recessed ring.)
Cutting threaded brass sleeve
For our 22” Reproduction sinks you would cut sleeve 2-1/2”. For our 30” Reproduction sinks you would cut at 1-1/2”.

Wall spout installed at 7” out from wall
You will need to twist off the brass sleeve by hand turning counter-clockwise. Remove and cut to length for desired spout length. Once the threaded sleeve is cut, put the threaded bell piece onto the un-cut end and screw the bell all the way off the other side of the threaded brass sleeve. This will help straighten out any of the threads from when it was cut. Then put the sleeve back onto the valve and lightly hand tighten. (Cut to this length for our 22” Reproduction sinks)

Wall spout installed at 7-1/2” out from wall
You will need to twist off the brass sleeve by hand turning counter-clockwise. Remove and cut to length for desired spout length. Once the threaded sleeve is cut, put the threaded bell piece onto the un-cut end and screw the bell all the way off the other side of the threaded brass sleeve. This will help straighten out any of the threads from when it was cut. Then put the sleeve back onto the valve and lightly hand tighten.

Wall spout installed at 8” out from wall
You will need to twist off the brass sleeve by hand turning counter-clockwise. Remove and cut to length for desired spout length. Once the threaded sleeve is cut, put the threaded bell piece onto the un-cut end and screw the bell all the way off the other side of the threaded brass sleeve. This will help straighten out any of the threads from when it was cut. Then put the sleeve back onto the valve and lightly hand tighten. (Cut to this length for our 30” Reproduction sinks)